DOROTA ORLOF · SPRING 2026
This is a learnng diary throughout my Study Project at Aalto University. During the semester I'm learning how to create hanging scrolls.
The project is carried out at the Printmaking Workshop, and supervised by Markku Reunanen. I will be adding brief logs for each session, and integrating knowledge outcomes in a dedicated section.
SESSION LOGS
16.01.2026
Wet flat mounting of different paper samples, 34x34cm:
- Double‑Xuan, Bamboo, 66g/m2
- Sheng Xuan‑Jiaxuan, 10% Sandal bark 90% Reis, 54g/qm
- Sheng Xuanpapier‑Xingong, 34g/m2
20.01.2026
Reviewing the gluing tests: the sides became too strongly attached to the board (sanded plywood), and there was no way to remove them other than tearing the margins. Removing the remaining paper from the board afterward also took a lot of time. I realized that this gluing technique creates wrinkles (from pulling) in the corners of the margins. It would probably make sense to wet the Wenzhou paper as well, so it can even out the tensions a bit more.
Now I’m making two new tests using coated boards and more diluted glue. I’m focusing on double Xuan paper; so far, all three samples worked well with Wenzhou (except for the corners).
For the first sample, I’m using more diluted glue, and I also wetted the Wenzhou paper in the corners so it wouldn’t pull as strongly (though I’m not sure if this is a good idea).
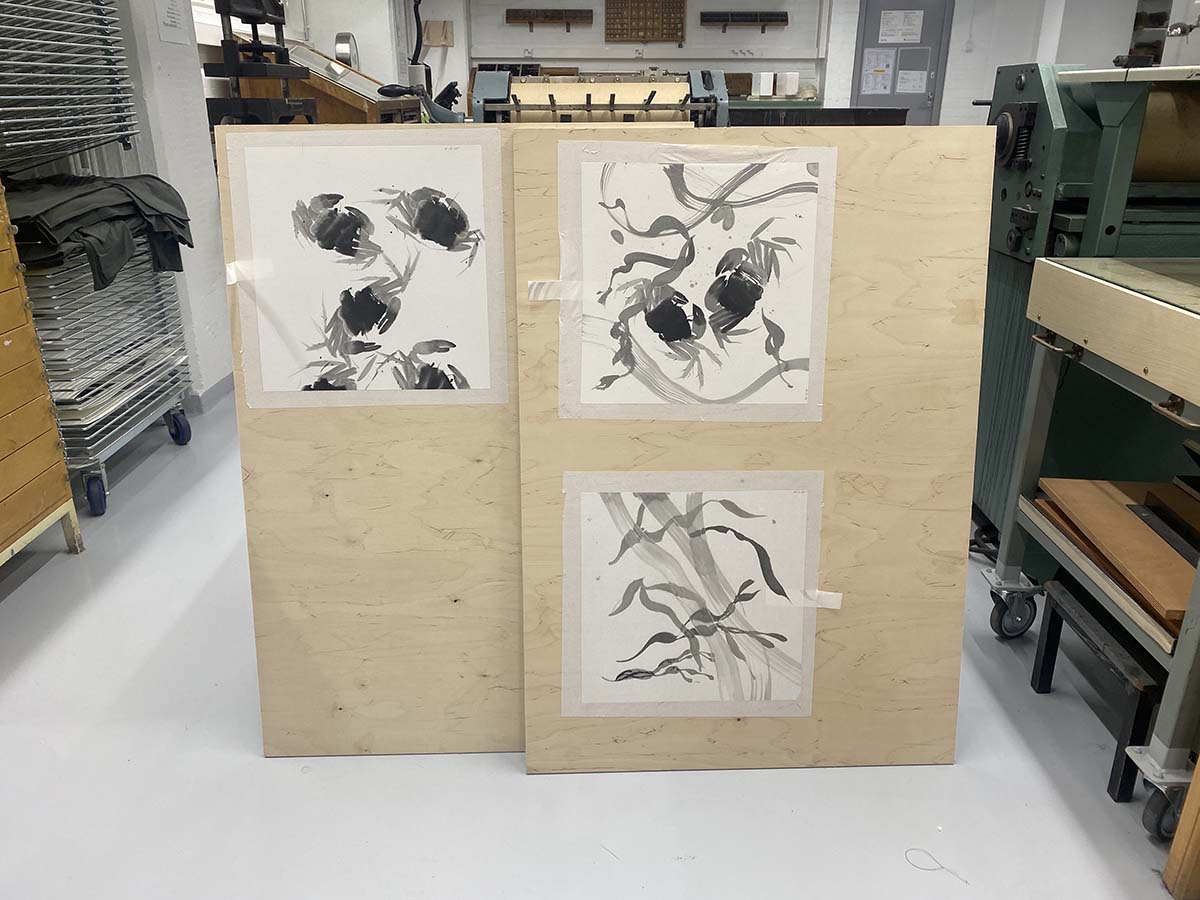
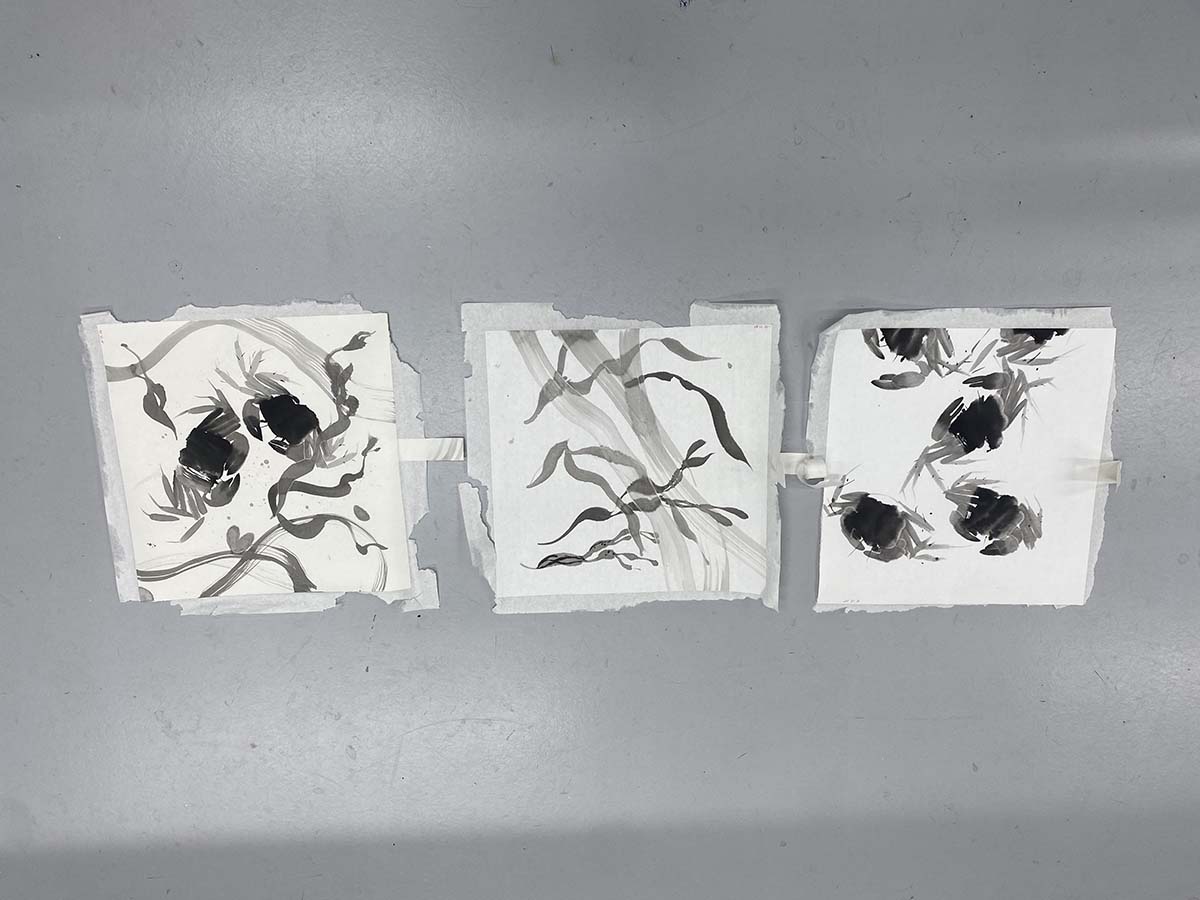
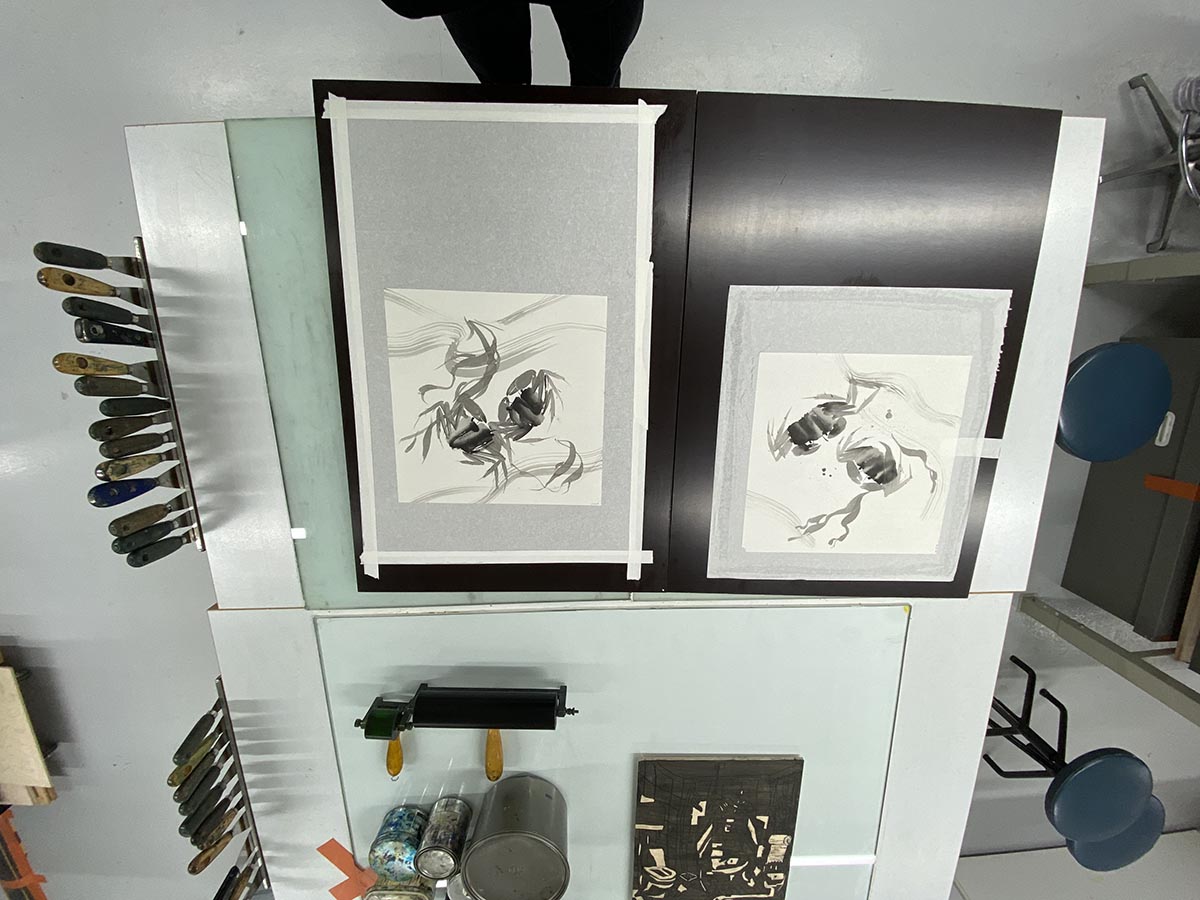
For the second sample, I’m testing a different strategy recommended by workshop master Maria. I make the Wenzhou paper completely wet directly on the board. After that, I apply glue to the back of the painting and press it onto the Wenzhou using a horsehair brush. I see a lot of wrinkles and too much glue, so I flip the whole mount over and remove the excess glue with a sheet of newsprint. Then I flip it back again, flatten it in the same way with newsprint, and attach water-activated paper tape along all sides. I have high hopes for this one.
23.01.2026
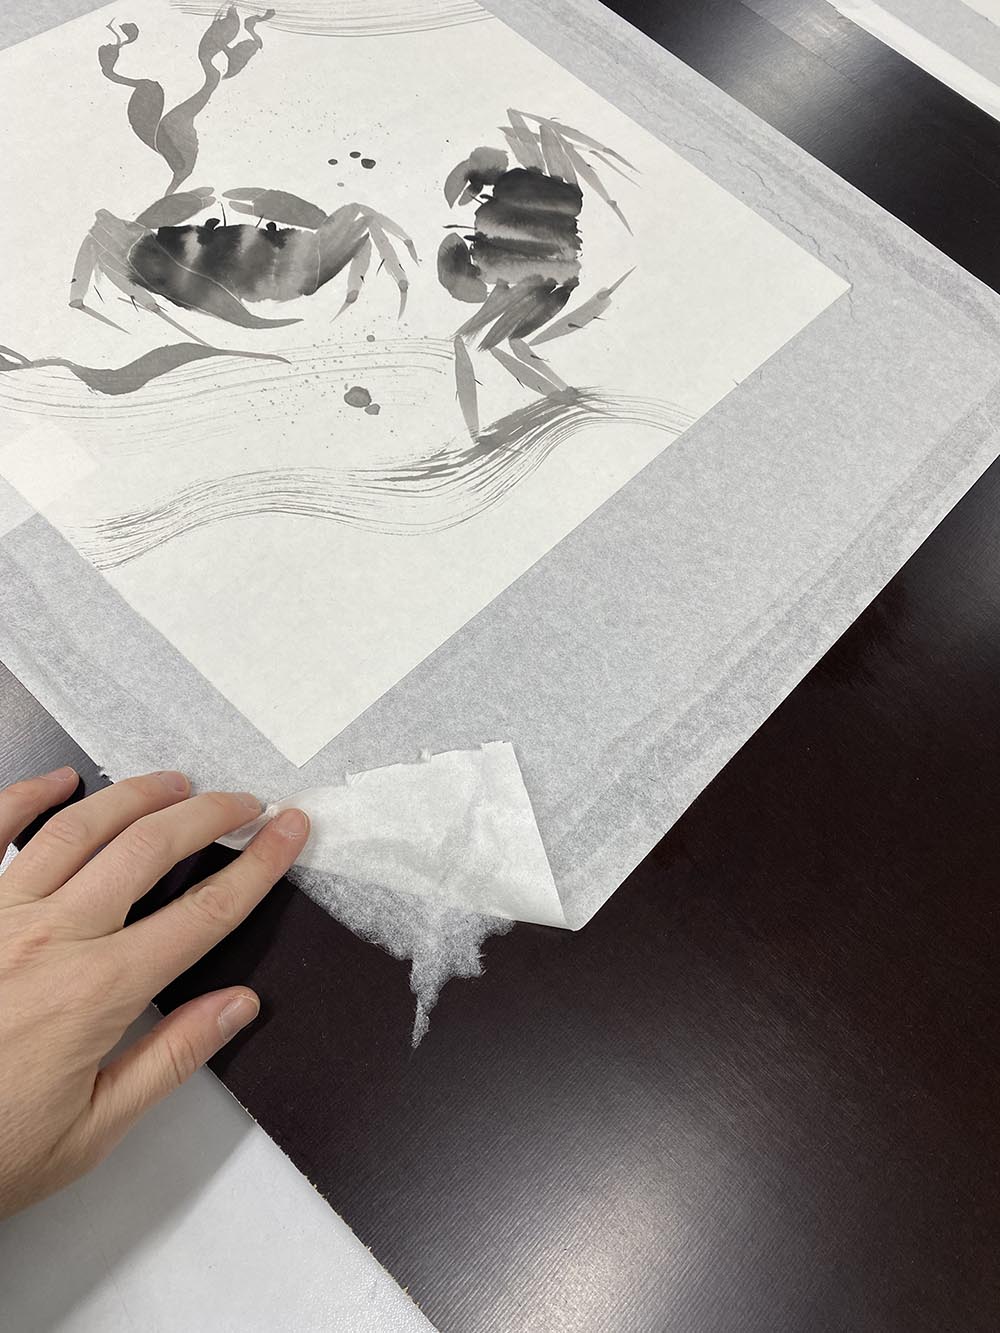
Reviewing the last tests: even on a coated board with weaker glue, the margins still have to be ripped off to remove the mount. One more attempt could be made using a super-diluted glue. There are also small wrinkles along the margins.
The other tests look quite good. However, the only way to remove the mount is by cutting it out with a scalpel. So far, this result seems the most promising. Cleaning the boards still takes a lot of time.
I also made small samples: damp + glue, wet + glue, and wet + glue + edges. Lesson learned: do not add more starch when the glue is hot—it will form lumps.
30.01.2026
Reviewing latest tests:
Backing paper with glue + painting dry
- can’t get the backing paper out of the board without ripping, but in theory if the glue would be even thinner it might work
Backing paper dampened + glue only on the edges + painting with glue
- can’t get the backing paper out of the board without ripping
Backing paper wet + edges with glue + painting with glue
- it’s possible to get the paper out of the board but likely to rip - could work with extremely delicate glue and living the “paper gap” (a narrow piece of paper).
Backing paper wet + corners with glue + painting with glue
- works ok, even didn’t pull the paper towards the corners - still would be good to leave a “paper gap”.
Backing paper wet + painting with glue
- works also well, have to test how it would be with bigger pieces
Next tests, with bigger painting samples (30X30 cm):
- Backing paper wet + edges with thin glue + painting with glue + paper gap
- Backing paper damp + edges with thin glue + painting with glue + paper gap
I want to test wet vs damp - sometimes the wrinkles happen when moisturising the paper with goat brush. In many tutorials it’s written one should only dump Weinzhou. I’ve find out a more sensible way of damping: moisturise table (glass) surface, place the paper, brush with the goat brush, then sprinkle some more water, and if needed pet with moisturised brush again. One has to do it gradually.

13.02.2026
Reviewing latest tests:
- one painting detached from the mounting paper due too weak too weak glue solution
- one mounting paper wrinkled due not even damping Today i will be working on more even damping. I’ve brought a piece of felt (ca 50x70cm) that i’m testing in different ways:
- making it completely wet - then placing a mounting paper onto it and brushing with goat brush, so the moisture would go through it from below
- placing the mounting paper on top of dry felt, sprinkling the paper with solid amount if water, then brushing it with goat hair brush so the excess water would be soaked by the felt
Approach 2 was a success! Paper got moisturized evenly and not too much and it was easier to unroll it onto the painting with the glue. It’s a good practice to roll the wet mounting paper around the wooden rod and unroll it from the left side (if you are right handed) onto the painting. One just have to proceed in a fit manner, the backing paper is drying fast.
After fixing the backing paper on top of the painting (reversed) i’m flipping around the whole mount and getting rid of excess glue with a newsprint paper. Then everything goes onto a board and i’m “painting” the edges with diluted wheat paste.
Let’s see how this will look next week.
LEARNINGS
Backing Paper
Wenzhou paper - Mulberry bark, 46 g/m² - good for backing, it has long strong fibres and distributes tension evenly when drying. Its flexibility is good for scrolls.
Wet Flat Mounting Process
-
Prepare a wheat-paste from gluten-free wheat starch. Start with proportions 1:10 with cold water. Stir the mixture, warm up until the solution will get thicker, a bit more translucent, max until you will see a first bubble. Cool down, add cold water if necessary. The structure should be running like a thin, drinkable yoghurt.
-
Put the paper with a painting face down on a flat smooth, surface (ideally glass). Generously spread the wheat paste with a soft brush (goat hair, e.g. Yangmei )starting from the middle, towards the edges and corners of the paper. Double check if there are no dry spots left. Clean the table around the paper with wet cotton cloth.
-
Prepare the backing paper with proper margins (ca 3cm) in a roll. Align to a ruler or a piece of wood positioned in respective distance from the painting (distance of a margin). Start from the left side if you are right handed. Slowly roll out the paper and brush it gently with a clean brush (horse hair, e.g Tsukemawashi). The dry edges of the backing paper, (especially the right-side corners) will be pulled inwards by the paste - gently sprinkle them with water to relax, if necessary).
-
Cover the backing paper with newsprint paper and brush with harder brush (horse hair on synthetic) to remove all excess paste.
-
Apply the paste along the edges of the backing paper - leave a small gap between the artwork area and the edge paste. Fix a small strap of paper (2x7cm) so it would overlap the painting area and stick outside of the backing paper.
-
Transfer the papers (e.g. using a wooden rod) to a drying board (sanded plywood). Brush the edges again with dry brush (horse hair). Lift the paper strap and blow gently throughout the hole, so endure that the artwork area doesn’t stick to the board. Tap-press the edges again with a brush.
-
Let it dry for 1-2 days.